
Disclaimer - Balance training is inherently dangerous it can lead to injury or even death, I can not guarantee your safety if you do decide to use a board similar to this.
Additionally, i can not ensure that the design of this balance board is safe. If you are concerned about your safety or the safety of the design of this balance board, I would recommend finding a safer way to train your balance or to buy a professionally made balance board such as the goofboard.
This guide contains some of the things I have learned by building balance boards and is by no means a guide on how to create a professional quality balance board.
About Goofboards a.k.a rail to rail balance trainers
Parallel roller balance boards or rail to rail balance boards make great balance trainers for surfers because they simulate the feel of surfing and allow you to practice your footwork.
Rail to rail balance boards also great surf trainers because they allow you learn how to use heel and toe pressure to control the board similar to a surfboard.
A Rail to rail balance board is also good for casual balance training because they are safer to use then balance boards like the indo board.
This is because you do not sit as high off the ground when using them and there is less of a chance of the board shooting out from under you.
This rail to rail balance board is a lot of fun to use but challenging at the same time.
Check out my guide to goofboards to learn more about them.
Getting started with this diy surf trainer
The balance board I made has the same measurements as the goofboard classic.
The size of the goofboard classic is 44 inches by 15 inches the roller is 37 inches long and has a diameter of 4 inches
Or in metric 111.7 Cm by 38.1 Cm and the roller is 93.9 Cm long and has a diameter of 10.1 Cm.
You can try experimenting with the length of the board if you want. I was thinking about making a board that was 4 or 5 feet long to better simulate cross stepping to the nose of a long board.
I found I prefer to use a roller that is as long or a few inches longer than the balance board because it prevents the board from popping up if you put all your weight on the part of the board that does not have the roller under it.
Note this guide has pictures for two different balance board I made.
The first rail to rail balance board I made was out of strand board that I found in the trash. The board lasted me a few months before it cracked in half.
I knew it would be weak, but I just wanted to experience using a rail to rail balance board.
The second rail to rail balance board I made used5 or 6 ply wood and is much more sturdy and does not make the cracking sounds when I use it as the strand board would.
The thickness of the board is around 11/16 of an inch.
6 Steps to making a surf balance trainer
Step 1. Buy or scavenge a suitable size o ply wood
Some of the pictures in this guide are from the first board I build don't use this type of board it is too weak and will eventually crack the second board I made of 5 ply wood is much stronger.
Tip for finding free or cheap wood and what to do if you don't own any saws.
One tip for finding cheap or free ply would is to check construction site dumpsters.
Additionally, most lumber supply shops will have bins of odd shaped scrap ply wood that they do not charge too much for, sometimes they will even cut it down to size for you.

Step 2. Cut the board down to size.
The board I used is a replica of a goof board classic and is 44 inches long and 15 inches wide.
I used a table saw to cut the board down to size but if you do not have any power tools you can use a regular hand saw.

Step 3.
Cut the wood for the stoppers. The stoppers I used are 1 1/4 inches wide (31.75 MM) and around 11/16 of an inch thick (17.5 mm) and 44 inches long (111.76 MM) the same length of the board
The first board I made I had to use a piece of scrap wood to make the stoppers.
For the second board, I built I started out with a larger board around 46 inches wide and cut two strips of wood off the ends of it with a table saw leaving me with a 44-inch board and two 1 1/4 inch stoppers.


Step 4.
I clamped the stoppers to the board with the straightest side of the stopper facing the inside.
For those that are very observant the board in the pictures below is a different style of balance board I tried making that didn't work that well, but the principle of clamping the wood is the same.

Step 5.
Nail the stoppers to the board. I used finishing nails and nailed them from the bottom of the board about every 4 inches along the length of the stopper.
I did have a few of the nails poking out of the top of the board so make sure to check for that. To fix that problem Ihammered the nails until they were flush with the top of the board.

Step 6.
Find a suitable roller.

Choosing the right roller
Finding the right type of roller for your skill level can be the hardest part of making a diy balance board because different rollers will make the balance board behave differently.
Furthermore most mass produced balance boards come with a specially built roller that is going to be hard to replicate with parts that you can easily obtain so you are going to be left trying to find something to use as a roller that will be suitable for your skill level.
Below are are some of the different types of rollers I have personally tried using on diy balance boards and my experiences with them.
When using rollers with a larger diamenter, I felt the board was less twitchy and reacted slower helping to make it easier to use.
2-inch black pipe- The balance board was very twitchy, and the board slammed on the ground often, was very challenging to use and not very fun.
4 inch PVC pipe - Balance board reacted slower and moved slower, was fun to use but the balance board slid around on the PVC pipe.
4-inch PVC pipe with duct tape wrapped around it in a few spots- The tape slowed the board down and prevented it from sliding around on the PVC pipe. It was fun for awhile until my skills improved and I wanted the balance board to react faster and did not mind have the board slide on the pipe anymore.
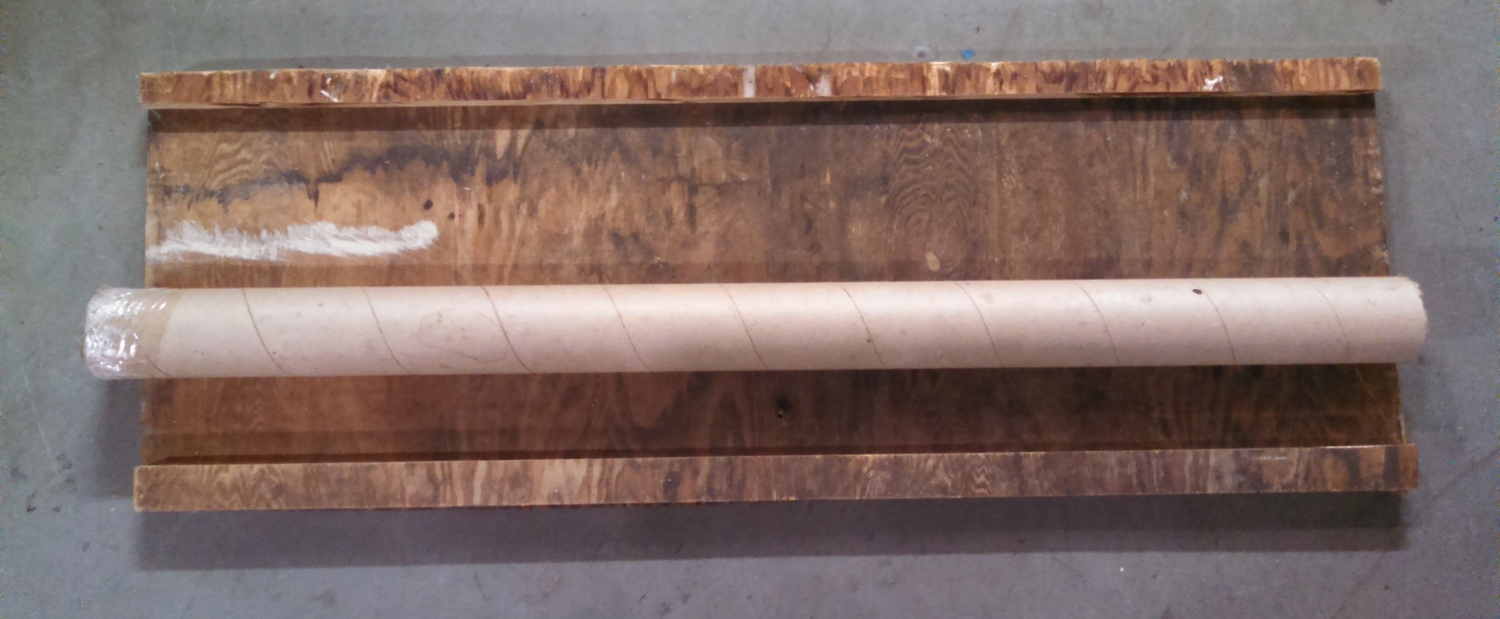
3-inch cardboard tube - (The tube is very thick, so it is strong) T The balance board reacts and moves faster and doesn't slide around as much as using the 4 in pvc pipe. The down side is over time the tub starts to warp or fall apart and needs to be replaced.
3-inch electrical conduit- board reacts quickly and slides around on conduit but I do not mind it now that my skills have improved.
Tip for finding free rollers.
The big cardboard tubes that carpet is wrapped around are perfect to use as a roller.
They are solid, come in different diameters and are usually between 10 to 20 feet long.
So even though cardboard tube may only last you a few months, you can get a few years supply of rollers out of one 20 ft long tube.
Try goingto a carpet store and ask them if they have any old tubes they should have plenty of them that they are planning to trash or just check their dumpster.
The pros and cons of this diy surf trainer
Some of the things i don't like about this board.
This board has to be used with your shoes on to prevent splinter in your feet.
The nails in the stoppers caused some damage to the carpet I was using it on.
It is ugly.
Things i liked about it.
It cost me nothing
It helped improve my surfing skills by helping me work on moves like cross stepping, help me to develop a better surfing stance and improved my overall heel to toe balance skills.
Some ideas for making this board better.
After you complete the build you can trace a surfboard shape on the nose and tail and cut it to shape with a jig saw.
Sand, stain and put a clear epoxy coat on the board. You can try mixing some sand in with the clear coat for added grip.
Put art work on the board or the roller.
Put skateboard grip tape on the top of the board.
Put spray on grip on the top of the board.
Put duct tape on the bottom of the stoppers to stop them from damaging the carpet.
Glue athin foam pad to the top of the board so you can use it with bare feet.
Experiment with duct tape or grip tape on the roller. It can help slow the board down or stop the board from sliding around on the roller.
If liked this guide, please help support this site by sharing it with your friends, social media or relevant site.
If you have any opinions for making a better surf trainer I would love to hear them; you can leave them in the comment section below.
Also if you build this board, i would like to know what you used for a roller and your experience with it.
Don`t want an ugly surf trainer? Check out one of these made by the pros.